Sunday, November 6, 2022

Fall Leaves Wreath

Hi friends! Today I am sharing a project that was inspired by a creator on Tik Tok. Joleen Emery makes beautiful paper art and one of my favorites is a heart made with paper feathers. 

I wanted a Fall theme for my heart, so I used the 6 Fall Leaves 2 (SVG, Silhouette) and cut out 150 cardstock leaves. For the base I used a 10-inch wooden heart but chipboard, cardboard, or even several layers of cardstock glued together would work. I also cut a small hole in the top of heart to add the twine to hang the wreath. Be sure to add the twine before you start gluing the leaves. With hot glue I glued the leaves onto the heart moving around heart shape and repeating that process until the heart was covered. To finish the wreath off I tied a bow to the twine. 


I love how this turned out and have plans to make one with feathers too. Thanks for stopping by and I hope you have a great week!

Brandie

Thursday, October 13, 2022

Give Thanks Ornament Tutorial

Hi friends! Today I am sharing a tutorial for a large Thanksgiving style ornament. I like to hang this type of ornament on the middle of a wreath. I used the In All Things Give Thanks 3 file (SVG).  The other supplies are a 1/4-inch wood round, heat transfer vinyl, twine, and a bead.

I sized the image to 4.463 x 4.301 to fit onto the six-inch round. I then deleted the round and sent the image to cut. 


In Cricut Design Space when using heat transfer vinyl, the images must be mirrored for each mat so that the images cut correctly. 


After weeding all the words. I dry fit all of my vinyl on the round just to make sure it all fit and to work out the placement. (I did change the word things to the darker color. The gold was just too light.)


Then with my heat press I attached the words to the wood round. I set my press to 300 degrees for 20 seconds. Let the vinyl cool slightly then peeled off the clear backing. 


I added a bead to the twine then looped it through the hole in the top of my round. 


Last I hung the ornament to the middle of my wreath. 


I love how this turned out. It is a perfect addition to this wreath and will look so pretty for Thanksgiving. 

Thanks for stopping by!

Brandie

Monday, October 10, 2022

Lori Whitlock Creative Team October 2022 Blog Hop


Hi there! Welcome to the Lori Whitlock Creative Team Blog Hop! The hop order this month is Traci, Kathy, Anita, Brandie, Ashley Cathy, Marcia, and Michelle. This month I am sharing another cute Halloween decor piece.  I made the Halloween Scene Cat (SVG, Silhouette). Lori has several other versions in her shop too. (SVG)

I used my Glowforge and cut them out of MDF. But this is designed to be cut out of paper. I cut mine a little bigger too. They are 11x7inches, painted black, and covered in glitter.


Thanks for hoping along with us today! Ashley is up next. Don't forget the free file today and enter the giveaway below!


a Rafflecopter giveaway

Monday, September 19, 2022

Pumpkins Sweet Spooks & Treats Sign

Hi friends! Today I wanted to share a cute little sign I made for my Halloween tiered tray decor. I used the Pumpkins Sweets Spooks & Treats file (SVG, Silhouette). I used my Glowforge laser cutter to engrave the image, but the same look can be achieved with vinyl. This saying would also be really cute on a shirt with iron on vinyl. This sign will be so cute in my kitchen for the spooky season.

Thanks for stopping by and happy spooky season!

Brandie

Sunday, September 18, 2022

Bakery Box Card Assembly Tutorial 8/25

Hi friends! I'm stopping by today to share a tutorial for the Box Card Bakery (SVG, Silhouette). This card is so darling and would make a fun birthday, get well soon, thank you, or just because card. 
I cut out all of pieces in various shades of cardstock and then inked around the edges of most of the pieces in matching colors to give them a little depth. 

This card does have several small images and for me the easiest way to assemble them is using a sticker maker. The adhesive is strong with no mess or glue seepage that can happen with wet glue. 


First, I folded all of the score lines into mountain folds. Then glued the white panel on what will be the inside of the card. This panel is to cover the holes for the door and window.  


I then assembled the bakery sign, and awning. Dry fit the white pieces before gluing into place. Each little piece has a correct place on the awning. The image cuts the stripes in the right order. If you are careful when taking them off of your mat and keeping them in order, you won't have a hard time assembling them.  Or if you are like me and go willy nilly pulling everything off the sticky mat it isn't too hard to figure out the correct placement. 


I attached the door and window frame first. Then added the awning, the top trim piece, then centered and the bakery sign. I also added the smallest bread loaf, donut, and cookie to the window display. 


For the insert I added the pretzel and largest loaf first then added the donut. 


Now its time to assemble the box card. Flip the card base over so that the inside is face down on the table. With the insert face up, valley fold the tabs, and add glue to the right tab only. Glue down on the card base. (I added the X to show where to glue.)  


Line up the tab with the top of the card base and to the left of the score line. 


For the left tab valley fold the tab and add glue. Then fold over the left side of the card base. (Aiming for the spot where I have drawn the X.)


Hold until the glue sets. 


The box card id ready to be closed up. Add glue to the last tab on the left then fold the right side of the card over. making sure everything is lined up. 


Now it is ready to be sent off to someone special. Thanks for stopping by today!

Brandie 


Monday, August 8, 2022

Lori Whitlock Creative Team August 2022 Blog Hop

How in the world is it August? August! Crazy. 

Hi friends. Welcome to the Lori Whitlock creative team blog hop! This month the hop order is Anita, Brande, Ashley, Cathy, Marcia, and Michelle. 

I have really enjoyed making the cards from the Summer Card Bundle 3 (SVG) and today I am sharing the 5x7 Hot Air Balloon Card (SVG, Silhouette). I changed up the sentiment a little by not printing the print and cut sentiment and adding a sticker from the paper collection. I used papers and stickers from the All About a Girl collection by Echo Park Paper. So cute! 


Next up on the hop is Ashley. Be sure to enter the giveaway and get your free file for today! Have a great week! 

Brandie 


Monday, August 1, 2022

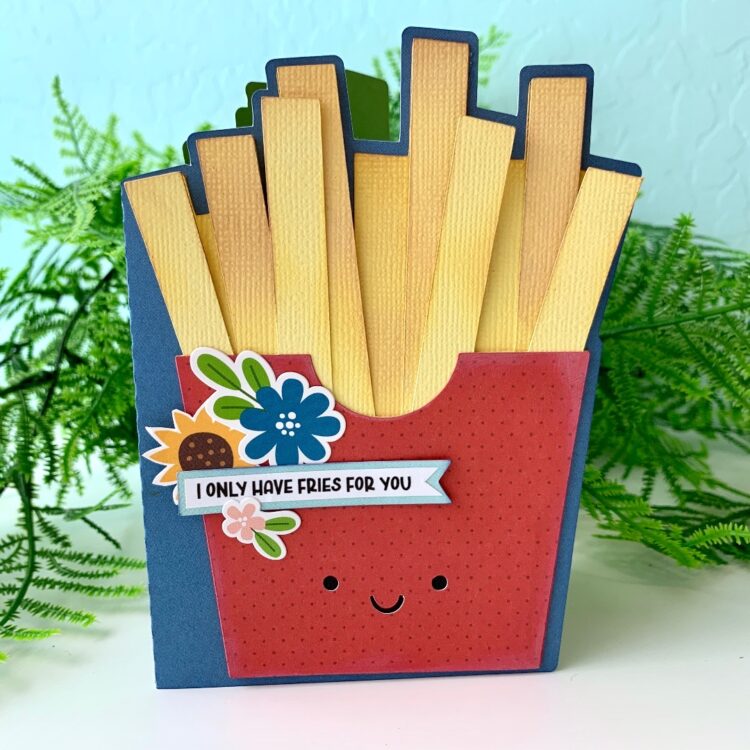
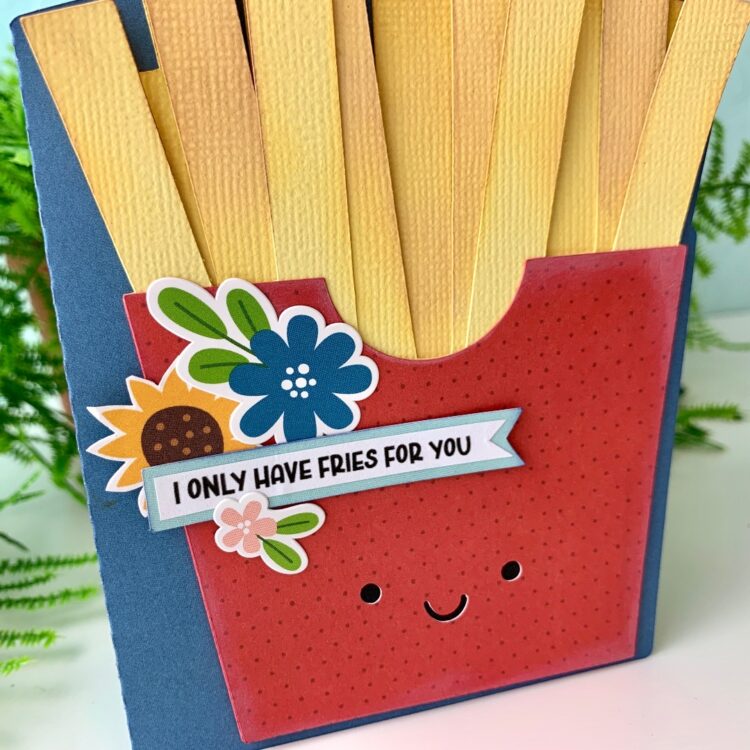
Fries For You Card

 Hi friends! Have you seen the new summer cards in Lori shop yet? (SVG) So cute! This french fry card is a perfect card for all the fry lovers, summer birthdays, and loves in your life (SVG, Silhouette). This A2 card is only a few layers and is easy to assemble. I inked the edges of my fries to add dimension and added a few flowers around the sentiment. Easy peasy!  The papers and stickers are from the Fun on the Farm collection By Echo Park Co.  

Thanks for stopping by and have a great week!

Brandie