Thursday, December 13, 2018

Nativity Christmas Ornament with Brandie

Hi there crafty friends! One of my favorite Christmas traditions is making an ornament for my tree. I have a seven foot tree covered in handmade ornaments that I love. Making Christmas ornaments was something I did with my family growing up and I look forward to passing on this tradition with my own family.


This year I decided I wanted to make a nativity ornament. I used the Nativity Mary Joseph Jesus file. ( SVG, Silhouette) and the 3D Poinsettia file (SVG, Silhouette). I also used a DIY ornament,  transparency film,  pink and green cardstock, gold foil paper, snow filler, and ribbon.

Once I had the nativity image into design space I selected everything and welded the image together.


I then resized the nativity to fit over a 4.25 circle. I wanted the nativity image to fill a lot of the circle without Josephs head hitting the top of the circle. 


While the images are stacked together I selected both images and sliced the images. Creating three separate images. I could have skipped this step and just fussy cut the corners off but doing it this way also helped me line up the nativity on the transparency film. I deleted the middle image and the one on the left. 


I then added another circle. Duplicated the nativity and flipped the duplicated image horizontally. This way the gold foil paper will be on both sides of the transparency film.  


I cut the nativity out of gold foil paper and the circle out of transparency film. I then glued the nativity to transparency film. On my first side I used wet glue. It worked but I could see the glue through the gold paper. I then used a tape runner to attach the second side. Which left no visible marks on the gold paper.  


For the assembly I added a little iridescent snow to the bottom half of the ornament, then the nativity,  a little more snow, and then closed the ornament together.  


To decorate the top I cut two 3D poinsettias. The flowers have three concentric layers, two centers and two leaves. I gently pinched each petal and then stacked and glued the flowers together.


I tied a loop and bow with ribbon and attached the flowers and bow with hot glue.


This ornament looks beautiful hanging on the tree. It would also make a lovely gift.  


I hope this ornament inspires you to make an ornament for your tree. Thanks for stopping by and Merry Christmas!

Brandie

Monday, December 10, 2018

Lori Whitlock December Creative Team Blog Hop


Hi there and welcome to the Lori Whitlock Creative Team Blog Hop! We are so glad you are here. The hop order this month is Lori, Traci, Kathy, Brandie, Brigit, Michelle, Aimee, Ashley, and Cathy.

I am sharing this framed lighted village I made with you today. It went through several remakes to get it just right. But I love how it turned out. I used the 5x7 Shadow Box Frame (SVG, Silhouette) and the Winter City Shadow Box Card (SVG, Silhouette).


Thanks for stopping by today. Brigit is up next!

Be sure to add this free cut file to your collection while you shop the 30% off sale!


 And enter the giveaway!


a Rafflecopter giveaway

Wednesday, November 21, 2018

Reindeer Banner

Hi there friends! Brandie here with a cute reindeer banner for Christmas. I used the Reindeer Shaped Card 2 (SVG, Silhouette) and the snowflakes can be found here.


My little guy was so excited when I hung the banner he kept asking me to tell him the reindeer names.


So do you decorate for Christmas before or after Thanksgiving? I have slowly been adding the Christmas décor this week. I love this time of year!  Thanks for stopping by today and enjoy the holidays!


Brandie


Monday, November 12, 2018

Lori Whitlock's Creative Team November Blog Hop


Hi there! Welcome to the Lori Whitlock Creative Team Blog Hop! We are so glad you are here. The hop order this month is Lori Whitlock, Traci, Kathy, Brandie, Michelle, Aimee, Ashley, Cathy, and Cori.

I made a few Thanksgiving Candy Huggers (SVG, Silhouette). I made the pilgrims to match my little family. These little guys are so easy to assemble and make a cute little gift for your thanksgiving dinner guests.


Be sure to check out all the new files on Loris site toady! Michelle is next on our hop. I hope you have a Happy Thanksgiving!

Brandie


Add this to your shopping cart, its FREE today!


Giveaway time!


a Rafflecopter giveaway

Thanksgiving Turkey Sign with Brandie


Hi there friends! I am sharing the one Thanksgiving related project I was able to finish before all the Christmas crafting begins.

For the sign I used the turkey from the 2 on 12x12 Tag Bag Turkey (SVG, Silhouette) and the Let the Stuffing Begin (SVG).  Papers and embellishments are from the Celebrate Autumn collection by Echo Park.


For the dimension I cut the main body shape, hat, beak, arms, and oval by hand out of cardboard and covered with paper.


 I cut the saying three times out of cardstock then glued them together.


That's it for me today. I hope you all have a safe and Happy Thanksgiving!

Brandie


Thursday, October 11, 2018

Halloween Shaker Card Tutorial

Hi there friends! I am sharing this a  tutorial for some spooky pastel shaker cards. I love that pastel colors are creeping into Halloween crafts and décor.

I used the 5 x7 Card Witch Boot, (SVG, Silhouette), 5x7 Card Ornate Witch (SVG, Silhouette), and 5x7 Card Ornate Cauldron (SVG, Silhouette). The black and white papers come from the Fright Night paper stack by American Crafts and the Halloween shaker bits are from Cartwright Sequins.


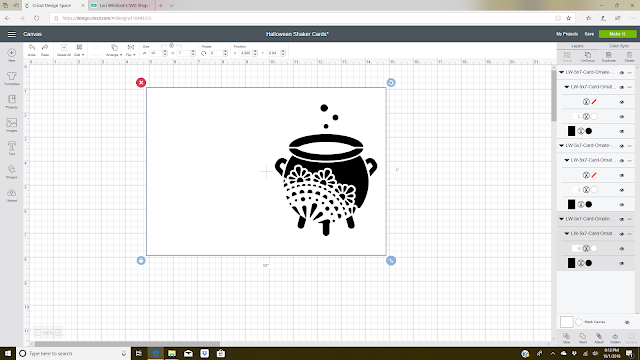
The cards needed to be adjusted for the shaker element. The first thing is to remove the score line. (I was careful not move the remaining images because they are aligned perfectly for slicing.) Once the score line was deleted I selected the white top layer and the second black layer and sliced the images.


Now that the two layer have been sliced I  have two white images and two black images. I deleted the two black images and the original white image.


I repeated the above steps for the other two cards. I then adjusted the size to be a perfect 5x7. This is now the fronts of my shaker cards.


I created a new card base for each of the cards. I added a 10x7 rectangle and add a score line down the center. I also cut three additional 5x7 rectangles for the bottom layer of the shaker element. 


For the shaker bits I created some pockets with a fuse tool and plastic page protectors. When I create shaker pockets I like to use a scrap piece of paper to help me fuse in a straight line. I made three pockets 4 3/4x6. I trimmed the excess plastic and added the sequins and star glitter to my pockets then fused the top closed.

I dry fit my shaker pocket with the front and back 5x7 rectangles then marked where I needed to attach the shaker pocket. I attached the shaker pocket with super sticky double sided tape. Then added two layer of craft foam around the edges of the shaker.

I then attached the die cut fronts to my shaker pockets with another layer of double sided sticky tape. Then attached the complete shakers to the card base with my tape runner. 


I also added some black and white bakers twine to finish off my cards.  


Thanks for stopping by today and have a Happy Halloween!

Brandie


Monday, October 8, 2018

Lori Whitlock's Creative Team October Blog Hop


Hi there and welcome to the Creative team blog hop! We are so glad you are here. Here is the order this month. Traci,  Kathy, Anita, Brandie, Brigit, Michelle, Aimee, Ashley, Cathy and Cori

I am still in Halloween crafting mood here. This Frankenstein fry box is so quick and cute. He will defiantly brighten the recipients day! You can find him in Loris shop and in the Silhouette design store. (SVG, Silhouette). And Frank isn't your guy there is also a pumpkin and mummy!   


Brigit is up next on the hop! Also be sure to checkout the free Halloween image today and enter the giveaway! 

Thanks for hopping along with us!

Brandie


a Rafflecopter giveaway

Monday, September 10, 2018

Lori Whitlocks Creative Team September Blog Hop


Hi there and welcome to the Creative team blog hop! We are so glad you are here. Here is the order this month.  Kathy, Anita, Brandie, Brigit, Michelle, Aimee, Ashley, Cathy and Cori.


I may have skipped right over the Fall décor and headed right for Halloween! I love how this wreath turned out. I used the 6 Fall leaves 2 cut file. (SVG, Silhouette) After the leaves were cut out I shaped them a little and then hot glued them to my grapevine wreath. I also added some orange glitter ball filler and knotted black tulle for texture.  


This wreath could easily made with fall color papers and would be adorable. Thanks for hopping along with us today. Brigit is up next. Also be sure to enter the giveaway and check out all the new images in Loris shop!


a Rafflecopter giveaway

Haunted House Box Card with Brandie

Hi there friends!  I am hosting a Halloween party this year and all the Halloween crafts came out early! I love this little haunted house and knew it would make the perfect invitation for the party.


The cut file is called Shaped Box Card Haunted House. You can find it in Lori's store and in Silhouette store.

The card has a few small parts so I recommend using a fine line bottle for gluing. I also used a ruler to make sure my windows lined up with each other, although wonky windows would be cute too! I used pop dots on the ghost, spider and porch roof. To finish everything off I added some Wink of Stella to a few places on the card.


The designer papers are from the Echo Park Bewitched collection.

Thanks for stopping by and happy crafting!

Brandie