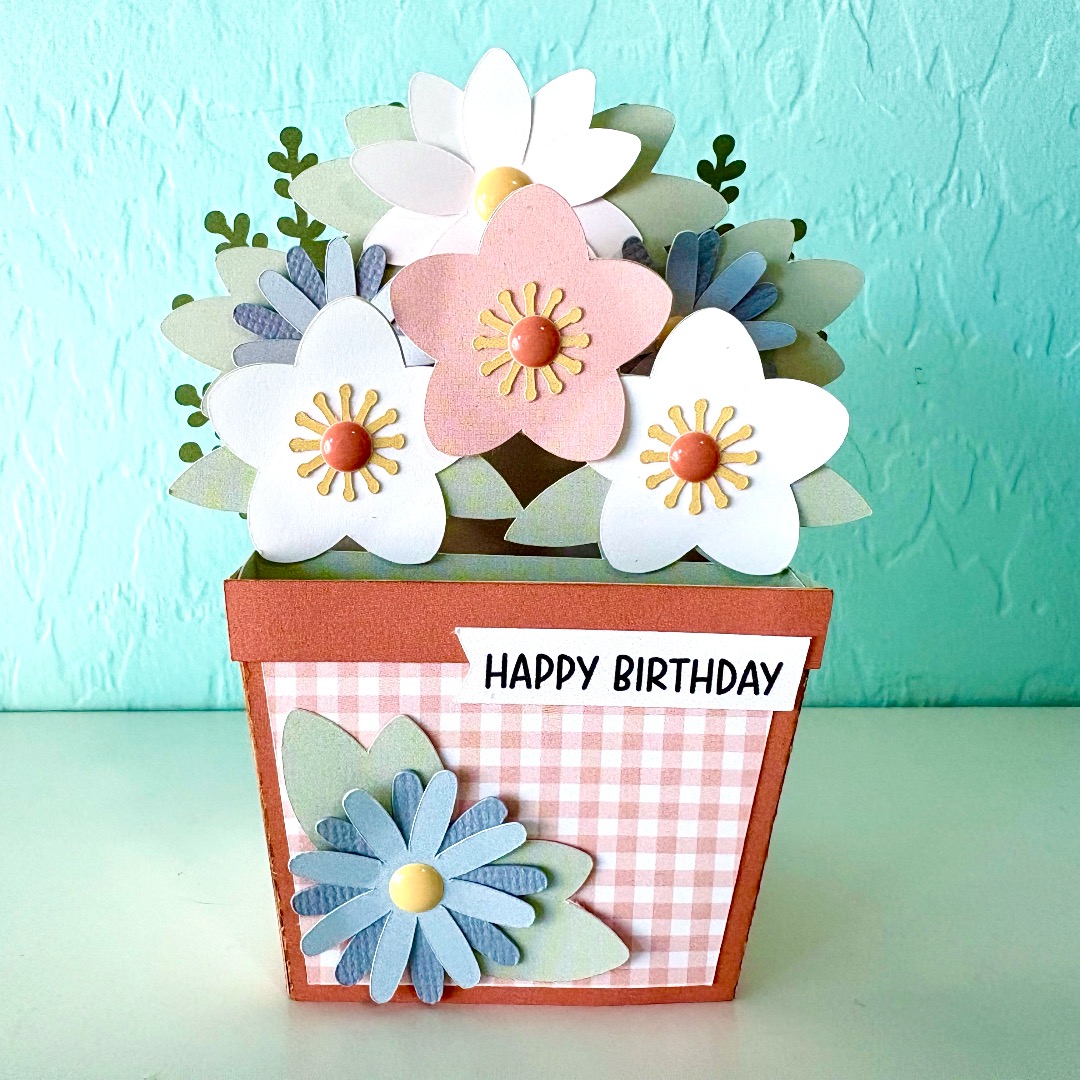
Hello crafty friends! Today I have a quick assembly tutorial for one of the new Flowerpot box cards. I used the Box Card Spring Flower Pot file (SVG, Silhouette). This file is so bright and cheerful. It has several print and cut sentiments so that it can be used for any occasion. I used the Happy Birthday sentiment, and the papers are from the Our Happy Place paper collection by Echo Park Paper Co.
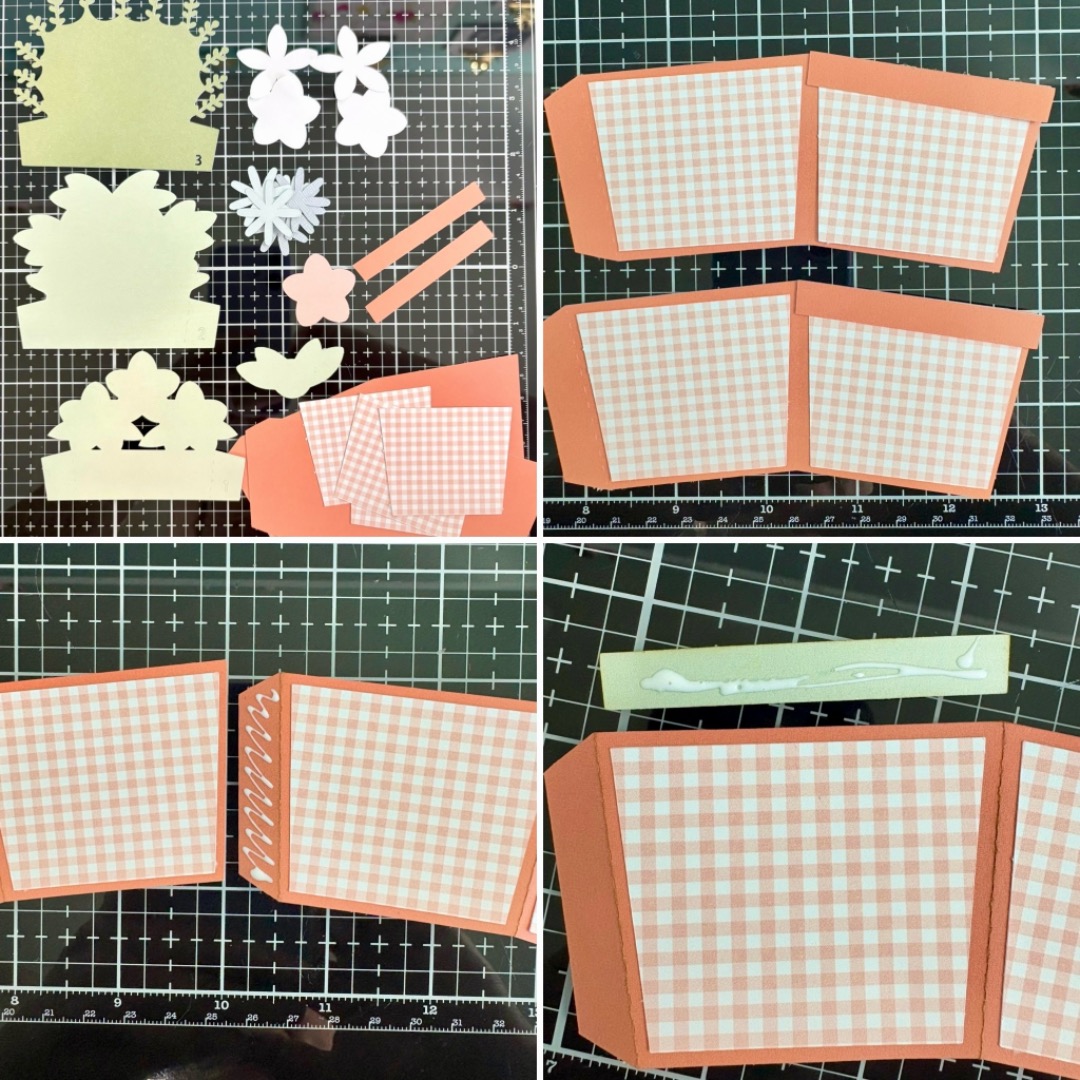
The box part of this card comes in two separate sections with two decretive panels on each. These two sections are glued together side by side. It also has two rim pieces that will be glued on the front and back of the card. The rim pieces hang over the edge of the pot a little so be sure not to add glue all the way to the edge of the paper. I glued the pot all together forming the square before adding the inserts this time as well.
Before the inserts are added to the box card the flowers need to be assembled. All of the flowers have multiple layers for added dimension. The file does come with centers for the flowers, but I used enamel dots for mine. After all of the flowers are assembled I added them to the inserts. Inserts one and two are the only ones with flowers. The third insert is plain green.
The tabs on all of the inserts are folded into valley folds and glue added to the backs of the tabs. I held the tabs folded down and slid the insert into the box, made sure the top of the tabs was flush with the top of box and front of the tabs was flush with the front of the box. After I had the tabs lined up, I folded the box card flat in both directions to make sure everything would lay flat. I then added the remaining inserts the same way but using the insert in front as the guide.
With the inserts all in place I then glued the flower and sentiment to the front of the box.
I love how versatile this box card can be. Thanks for stopping by today!
Brandie


.jpg)
.jpg)


.jpg)